 Guide Services Links Forum
In this section we are going to create an API for a simple expression evaluator. It will teach you how to create a project, how to name a project, and how to navigate around in the project. We also explain how to version packages.
You should have setup an empty Workspace as explained in [the previous]200-workspace.html) section. The text is written assuming that you are in the bndtools perspective.
We want to make a component that evaluates expressions. Though we could start with the implementation, let’s do it right and first define the contract. The service contract for now could be an interface:
package com.acme.prime.eval.api;
/**
 * A service that evaluates an expression and returns the result
 */
public interface Eval {
	/**
	 * Evaluate an expression and return the result.
	 */
	double eval(String expression) throws Exception;
}
Ok, it does not get a lot easier than this!
Best practice is to give service contracts their own projects so they can easily be shared. So let’s create an API project. OSGi enRoute has special templates for an API projects. It actually deduces that a new project is an API project when the project name ends with .api. This is not the only name enRoute recognizes. You can actually use the following suffixes:
.test – An OSGi test project, tests are run inside a framework..provider, adapter – An implementation project.api – API only project.application – An application project. This is a project that binds together a set of components and parameterizes them.So let’s create the com.acme.prime.eval.api project. Start with New/Bndtools OSGi Project. Add the name of the project (com.acme.prime.eval.api).
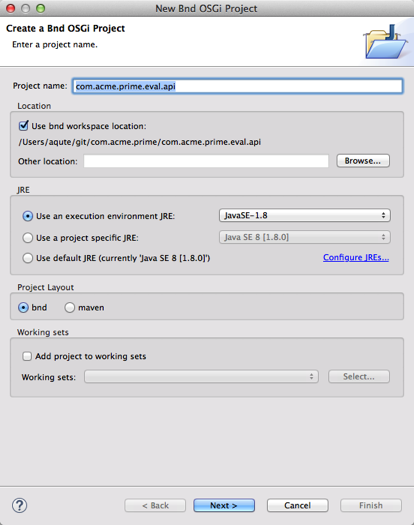
Click on Next so that we move to the page where we are going to select a template. For the template, select the OSGi enRoute templates. The OSGi enRoute template will pick an appropriate layout for your project depending on the last segment of your project name.
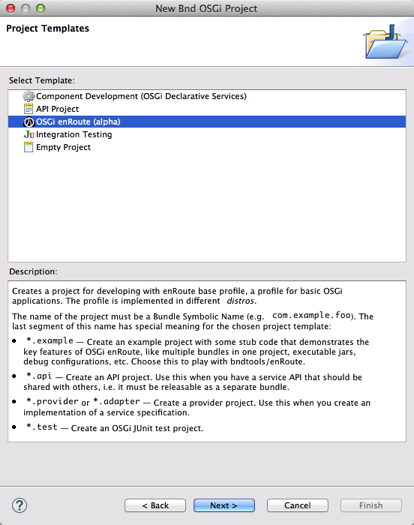
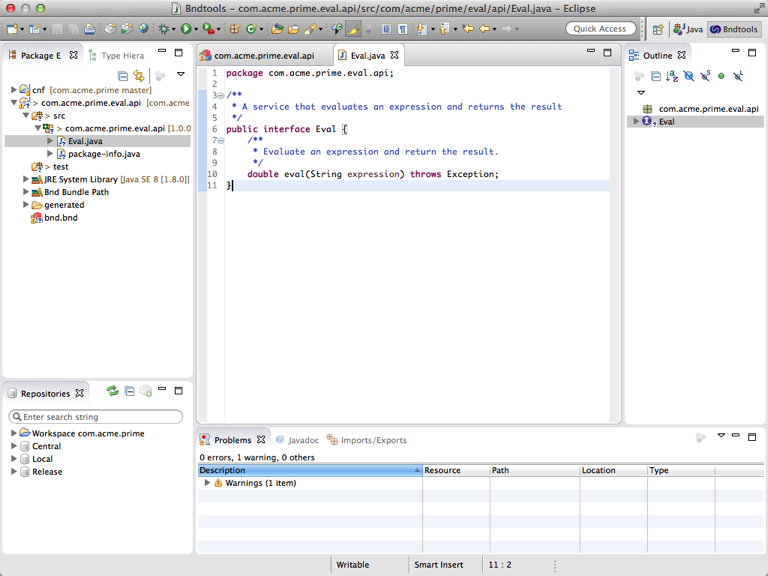
Then you can just click through Next, we do not have to set anything on this page, just continue and click Finish. This creates a small project with all the options set to treat it as an API project. The templates already created the Eval interface for you in the right package, just fill in the source code we discussed earlier.
That is it! You just created your first bundle! If you do not believe it, then go to the generated folder in the project and double click on the com.acme.prime.eval.api.jar file. This will open a JAR Viewer on your fresh bundle. By default, it opens the Manifest which was generated by bnd but you can traverse the bundle and look at the contents.
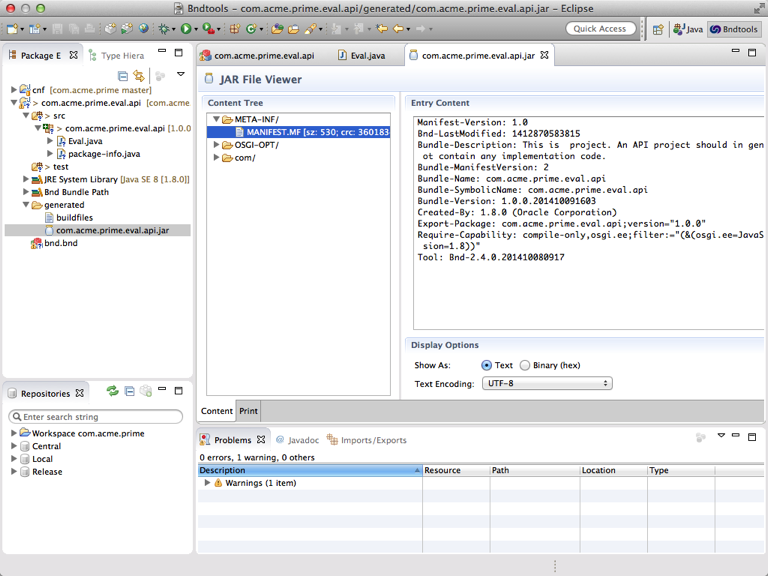
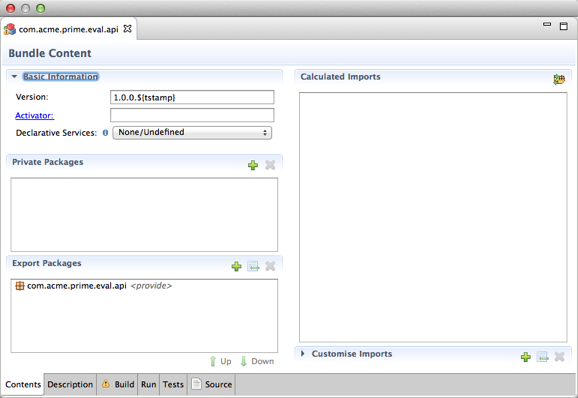
Notice how the manifest shows we’ve exported the com.acme.prime.eval.api package. Exporting means it has been made available to other bundles. You can see the exports (and imports) if you double-click on the bnd.bnd file and select the Contents tab. In the Export Packages list you can see that we do export this package.
Our API bundle therefore looks as follows:

The box with rounded corners represents a bundle; the inside black box represents an exported package.
You might not have noticed it but you actually semantically versioned this package as well (don’t you love magic?). When you look in the com.acme.prime.eval.api package you will find the package-info.java file. Double clicking will show the contents. In this file we define the version of the package. If you make modifications to the package, you should always update the version in this file as well.
@org.osgi.annotation.versioning.Version("1.0.0")
package com.acme.prime.eval.api;
A bnd project is driven by the bnd.bnd file. This properties file defines the version, the build path and which packages should go into the bundle. In this case the file is:
Bundle-Version:1.0.0.${tstamp}
Bundle-Description: 				\
	This is  project. An API project should in general not contain any \
	implementation code.\
	\
	${warning;Please update this Bundle-Description in com.acme.prime.eval.api/bnd.bnd}


Export-Package:  \
	com.acme.prime.eval.api;provide:=true

Require-Capability: \
	compile-only

-buildpath: \
	osgi.enroute.base.api;version=1.0
bndtools takes this information and instructs Eclipse to act accordingly. In the gradle build we will get to later, bnd instructs gradle environment so that both environments build the same JARs.